
Getting started with Reddcoin StakeBox
StakeBox and Reddcoin have partnered together to bring you the Reddcoin StakeBox - a device that allows you to stake your Reddcoin cryptocurrency and make a return on your investment.
Staking Reddcoin is the process of securing the network with your coin weight, which in turn rewards you with new Reddcoin.
This quick guide will show you the steps to take to start staking with your reddcoin using the graphical interface. This guide assumes you have some basic knowledge of how to use Linux OS.
Note: This guide is for reference only and we cannot be held responsible for any loss or theft of wallet data. Please make sure you back up your wallet and passphrase in a variety of locations.
What you will need

Assemble your hardware
- Connect your HDMI cable to your TV/Monitor
- Connect your USB Keyboard & Mouse to the StakeBox
- Insert your Reddcoin microSD card into the SD slot (If purchased separately)
- Connect the micro USB power adapter to the StakeBox
Download Reddcoin Booststrap Blockchain
Bootstrap is a database file to verify the block in a wallet, which was in sync by someone before. This is a method of significantly speeding up the synchronization process in the wallet. By using a bootstrap file you will only need less time than normal to sync the wallet. Luckily for you there is a handy little bash script already created and all you need to do is run it before you launch the Reddcoin application.
- Firstly, make sure you are connected to the internet, either using Wi-Fi or via the Ethernet connection.
- On the Desktop of your Reddcoin StakeBox you should see a script file called “Download reddcoin blockchain”, if you double click this file it will begin to automatically download the Reddcoin Blockchain and extract it into the correct file directory.

Note: The download file is 2.7GB and depending on your internet connection it may take some time to download and extract. If you are prompted to overwrite some file simply type in “Yes” into the command line.
- Once completed press enter on your keyboard to exit.
Launch Reddcoin Graphical Interface
Note: Before you launch the reddcoin application for the first time it is important that you disconnect from the internet.
It is not possible to import blocks to an already partially network-synchronized blockchain. The amount of connections to the network during the import should be 0 and you can check this in the debug menu.
Note: The import process could take 24 hours to complete, so please be patient
Once you have booted into the desktop you should see the Reddcoin application icon amongst some other applications and files.

Double-click this to launch the Reddcoin graphical interface application.

When the application launches it will automatically start to index the already downloaded blockchain and this process could take several hours to complete.
Once the indexing has complete you can then connect to your Wi-Fi or Ethernet for internet connection and the Reddcoin application will begin to synchronize the rest of the blockchain.
Note: The whole process could take between 24-48 hours to complete
Once completed you should see a green tick in the bottom right hand side of the screen.

But in the meantime there are a few things that we can do until it fully finished synchronizing.
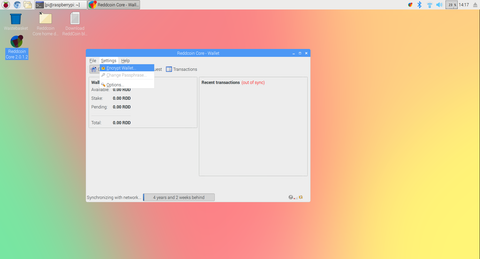
Encrypting your Reddcoin wallet
- Firstly, and more importantly we need to encrypt your wallet to make sure all your Reddcoins and data is safe. To do this go to Settings in the menu and then click Encrypt Wallet.
- Here you must type in a passphrase that is at least 10 characters long. Warning: do not lose this passphrase otherwise you will not be able to access your wallet.

- Enter your passphrase again to confirm it was correct and click ok.

- You will receive a warning notification that if you encrypt your wallet and lose your passphrase you will lose all of your reddcoins. If you are happy to proceed then click Yes to continue.

- Once your wallet has finished encrypting you will receive a confirmation message and you will need to restart the Reddcoin application for the changes to take effect. Click Ok to close the Reddcoin application.
- Once the application has closed go-ahead and launch it again from the desktop.
Unlocking your Reddcoin wallet for staking
In order for you to start staking it is important that you unlock our wallet first, otherwise the staking process will not work as the application cannot access your wallet.
- Go to Settings > Unlock Wallet in the menu

- Enter your passphrase used to encrypt your wallet and click OK to unlock

- Your wallet is now unlocked and ready for staking. You should see in the bottom right hand corner the unlocked padlock symbol, which indicates the wallet is unlocked.
Note: When you close the Reddcoin application your wallet will automatically lock itself for security reasons
Receiving address
Now that we have encrypted your wallet it is time to start sending Reddcoins to your wallet. To do this you will need to know what your receiving address is.
- In the main menu go to File > Receiving addresses...

- Here you will see a list of available receiving addresses where you can send your Reddcoins to.

- Once the Reddcoin application has finished synchronizing the blocks and as long as your wallet is unlocked and you have Reddcoins in your wallet, the staking process will begin automatically.
Auto start Reddcoin on boot
Chances are you will leave your StakeBox running 24 hours a day for staking, however in the event that your StakeBox looses power by accident, the staking process will stop and you will no the wiser. To prevent this from happening it is possible to launch the Reddcoin application when the OS boots up.
- In the manu navigate to Settings > Options

- Make sure you check the box Start Reddcoin on system login and then click ok to confirm those changes
Everytime your StakeBox restarts it will now automatically start the Reddcoin application and begin staking again.
Backing up your wallet
An important aspect of keeping your Reddcoins safe is backing them up and storing them somewhere safe; at least two different locations if possible.
- In the menu navigate to File > Backup wallet

- Save the backup wallet to a location on the StakeBox file system, by default the location is Documents.
To transfer the files from the StakeBox to your computer you can connect a USB flash drive to the StakeBox and then copy and paste the backup wallet file.
Note: It is highly recommended that you also protect your Flash drive by encrypting it with a password in the event that you may lose it.
- Insert your USB flash drive into a spare USB 2.0 socket on your StakeBox. The Flash drive will automatically be detected as a drive and its directory will become available.
- On the Desktop click on the file icon on the top tool bar
- Navigate to where you saved your wallet backup file and right click to copy or go to File > Copy
- Navigate to the USB flash drive in Media > Pi > NAME OF FLASH DRIVE
- In the menu select File > Paste to make a copy of the backup wallet
For further information on the Reddcoin software platform you can visit their GitHub page or find information on their Wiki. For the latest updates and discussions please visit reddcointalk.org.