
How to remotely access your CloakCoin StakeBox
If you intend on running your StakeBox as a standalone device in the future without the need for access to the command line interface through a HDMI TV/Monitor, then this section will show you how to remotely access your StakeBox.
The Raspberry Pi, at the heart of StakeBox has Wi-Fi and Ethernet network capabilities and as such we are able to remotely login to the Raspberry Pi command line from another computer on the same network. First you will need to connect to your local Wi-Fi or Ethernet router.
Ethernet
Ethernet is as simple as connecting an Ethernet cable from your StakeBox to the back of your router. For Ethernet DHCP settings you will need to refer to your instruction manual.
Wi-Fi
Since CloakCoin is built-upon Raspbian Lite, everything we do must be done using the command line interface. When you first boot/power up your CloakCoin StakeBox you will see the command prompt if you are connected to a HDMI monitor/TV. First thing you will need to do is open the spa_supplicant.conf file, this is where the Wi-Fi configuration setting will be. Type in the following or copy and paste the command into the command line:
sudo nano /etc/wpa_supplicant/wpa_supplicant.confIn this file you will need to add the following:
network={
ssid="YOUR_NETWORK_NAME"
psk="YOUR_NETWORK_PASSWORD"
proto=RSN
key_mgmt=WPA-PSK
pairwise=CCMP
auth_alg=OPEN
}
Replacing "YOUR_NETWORK_NAME" with your routers SSID and "YOUR_NETWORK_PASSWORD" with the password you use to connect to your Wi-Fi. Usually you can find these details on the back of your router in the manual/letter that came with the router. Now reboot your StakeBox for the changes to take effect:
sudo rebootOnce you have rebooted back to the command prompt you can check to see if you are connected to your router via Wi-Fi by typing in the following command:
ifconfigYou should see something like the following:

Wlan0 is your Wi-Fi adapter on the StakeBox, here you should see that it has an IP address. At this point you can now safely remove the Ethernet cable and rely on the Wi-Fi for internet connection.
SSH
SSH is a network protocol that allows you to remotely access another device and issue commands in the command line, just like you would if you were sat in front of that terminal. By default SSH is already installed for you on your StakeBox, all you need to do is enable it.
To enable SSH on your StakeBox follow these steps:
-
Enter
sudo raspi-configin a terminal window - Select Interfacing Options

- Navigate to and select SSH

- Choose Yes

- Select OK
- Choose Finish
Alternatively, you can use systemctl to start the service from the command line:
sudo systemctl enable sshsudo systemctl start sshYou may have noticed a warning message when you have logged in to the Raspberry Pi stating that the default password has NOT been changed and this is a security risk. To change the default password, you can type the following in the terminal window:
passwd Follow the on-screen prompts to change the password.
Setup your SSH client on your computer
You can use SSH client on almost any operating system including the following:
- Linux/Mac OS
- Windows
- iOS
- Android
Linux/Mac OS Client
You can use SSH to connect to your StakeBox from a Linux computer, a Mac, or another StakeBox, without installing additional software, making it much easier to use than other operating systems.
You will need to know your Raspberry Pi's IP address to connect to it. To find this, type ifocnfig wlan0 or ifconfig eth0 from your Raspberry Pi terminal. Next to inet you should see your IP address.

If you are running the StakeBox without a screen (headless), you can also look at the device list on your router. To connect to your StakeBox from a different computer, copy and paste the following command into the terminal window but replace 0.0.0.0 with the IP address of your StakeBox
ssh pi@0.0.0.0If you receive a connection timed out error, it is likely that you have entered the wrong IP address for the Raspberry Pi.
When the connection works you will see a security/authenticity warning. Type yes to continue. You will only see this warning the first time you connect.

In the event your StakeBox has taken the IP address of a device to which your computer has connected before (even if this was on another network), you may be given a warning and asked to clear the record from your list of known devices. You can simply type in the following to clear the device replacing the IP address with that of the StakeBox:
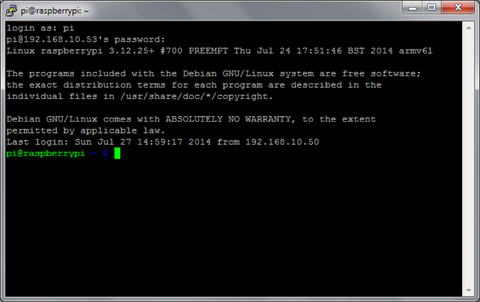
ssh-keygen -R 192.168.0.23Next you will be prompted for the password for the StakeBox login: on Raspbian OS the default password is raspberry, unless you have changed it in the previous section. You should now be able to see the Raspberry Pi OS prompt, which will be identical to the one found on the StakeBox when you boot it up.

If you have set up another user on your StakeBox, you can connect to it in the same way, replacing the username with your own, e.g. chris@192.168.0.2

You are now connected to the StakeBox remotely, and can execute commands from the command line.
Windows Client
On Windows you will need to download an SSH client. The most commonly used client is called PuTTY, and can be downloaded from greenend.org.uk
Look for putty.exe under the heading for Windows on Intel x86.
- Add your StakeBox as a host
PuTTY does not include an installer package: it is a stand-alone .exe file. When you run it, you will see the configuration screen below:

Type the IP address of your StakeBox into the Host Name field and click the Open button. If nothing happens when you click the Open button, and you eventually see a message saying Network error: Connection timed out, it is likely that you have entered the wrong IP address for the StakeBox.
If you do not know the IP address, type hostname -I in the Raspberry Pi command line.
- Connect
When the connection works you will see the security warning shown below. You can safely ignore it, and click the 'Yes' button. You will only see this warning the first time PuTTY connects to a Raspberry Pi that it has not seen before.

You will now see the usual login prompt. Login with the same username and password you would use on the StakeBox itself. The default login for Raspbian OS is pi with the password raspberry.
You should now have the Raspbian OS prompt, which will be identical to the one found on the StakeBox.
You can type exit to close the PuTTY window.