PiJuice NatureJuice Project
In this guide we will show you how to put together the famous NatureBytes Wildlife Cam Case so that it runs a Raspberry Pi completely off grid running off the PiJuice. This specific project has been designed to run using the PiJuice Zero which will be available for purchase shortly.
This project requires the PIR to be connected directly to the PiJuice instead of the Raspberry Pi so that power will only be provided when necessary thereby saving the battery charge as much as possible.
The ability to efficiently use the battery charge is one of the main features of this project and we have optimised the configuration of both the software and the hardware so that the Raspberry Pi is powered on only when required and with the minimum of its hardware running. Have a look at How to save Power on your Raspberry Pito know more.
What you will need
This is a list of parts you will need to build this project:
- 1 Raspberry Pi 3 Model A+
- 1 PiJuice Zero board
- 1 NatureBytes Wildlife Cam Case
- 1 Battery 5000 mAh
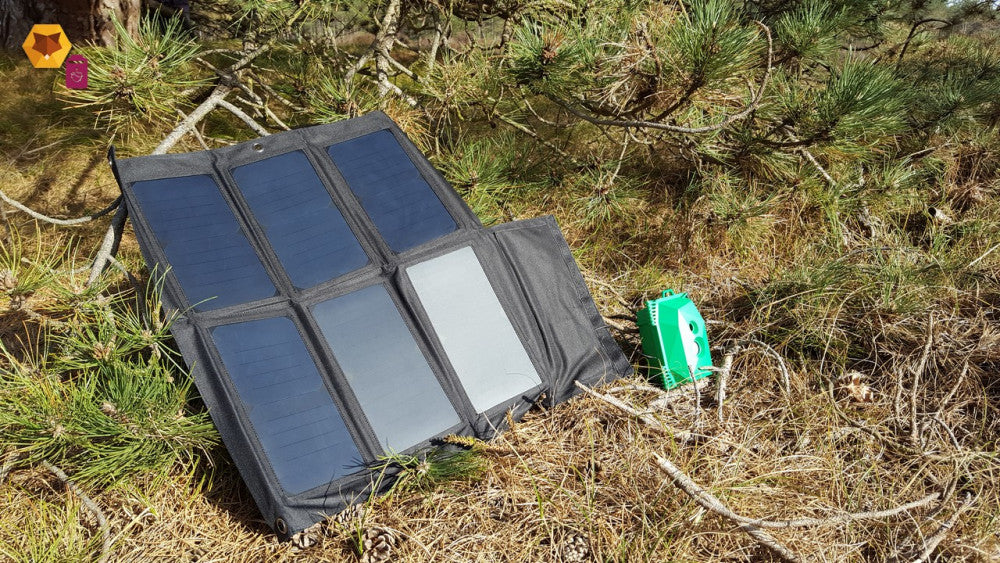
- 1 PiJuice Solar Panel – 40 Watt or smaller (Optional)
- 1 Power Supply 2.5A (Optional)
- 1 8GB MicroSD card or bigger
- 1 PIR Motion Sensor
- 1 Raspberry Pi NoIR Infrared Camera Board v2.1 (Or other version)
- 4 Spacers (M2.5 – 1 x 1.2 mm, 1 x 7 mm 2 x 8 mm) and 2 Nuts
- 1 Stacking Header
- 1 6×1 right angled header
Modify the PIR
The PIR Motion Sensor will not work directly in conjuction with the Raspberry Pi, in fact it will be connected to the PiJuice P3 connector. The PiJuice has the possibility to power and communicate with alternative kit via P3, it can provide power via pin 2 (5V) and 4 (3V3) but only pin 4 remains active even when the Raspberry Pi’s power is removed. For this project we will then need to use pin 4 and 3 to power the PIR Motion Sensor. We will then use pin 6 IO2 connected to Dout to detect motion directly via the PiJuice.
The PIR is designed to be powered via 5V and an on-board regulator will then convert the voltage to 3V3. As we will be using a 3V3 source we will then need to remove the regulator and a small diode as shown in the picture. You will then need to solder a small wire as shown. The VCC pin is now ready to get 3V3 directly.

The connections to the PiJuice will then be:
- VCC – Pin 4
- GND – Pin 3
- OUT – Pin 6

The NatureBytes kit is provided with detailed instructions however as we will be needing to make some adjustments we will detail below all the steps that deviate from the original manual.
Step 1 – Get the Raspberry Pi and install the stacking header on it.

Step 2.1 – Install and solder the 6×1 header on P3 of the PiJuice.
Step 2.2 – Install the spacers in the positions indicated by the arrows only.
Step 2.3 – Connect one end of the Raspberry Pi Camera flat cable. The camera flat cable comes pre-attached on one side. Detach it from the camera before proceeding to step 3.
Step 2.4 – Connect the PIR Motion Sensor as specified above.

Step 3 – Proceed to install the PIR Motion Sensor and the Raspberry Pi Camera as shown here and detailed in the NatureBytes manual on page 8,9 and 12,13,14. As the PiJuice will be very close to the nuts provided with the kit we would advise to adopt a similar approach to the one we have taken by providing some form of electrical insulation. We used heat shrinking tubing as shown in the picture. Simply place the brass nut into the tubing so that a bit of the tubing sticks out on each end as shown on the right. Once shrunk it will look like the ones on the left. Remember the short black spacers are for the PIR and the long for the camera. The short bolts are for step 5 but we showed them here for completeness of what hardware you will need to use from the kit for this project.
This is the hardware you will use of the NatureBytes Wildlife Cam Case :
- 4 x 25 mm bolts
- 2 x 18 mm spacers (for the camera)
- 2 x 15 mm spacers (for the PIR)
- 4 x brass nuts
- 4 x 6 mm bolts

Step 4.1 – Connect the battery to the PiJuice.
Step 4.2 – If you want to use the solar panel or the PSU to recharge the battery this is the time to do it.
Connect the micro USB to the PiJuice not to the Raspberry Pi.
The kit can also run off one battery charge so this step is optional. If you need either the PSU or the solar panel make sure you run the cabling through the case first as it might not be possible once the connector is plugged onto the PiJuice.
Step 4.3 – Install the PiJuice and Raspberry Pi assembly on the main insert as shown below. The nuts used in this step will have to be purchased together with the 4 spacers used in step 2.

Step 5 – Finally place the insert in the case. The PIR might give you the impression that the whole assembly is somewhat wrong. Put the two bolts at the bottom then gently push the insert at the top and fix the remaining two bolts.
The battery will remain fairly loose in the case. You might want to consider adding a piece of a kitchen sponge just to keep things firm once the case is closed.

Software Setup
The script used for this project has been prepared for the latest version of Raspbian Lite and it is available on our Github repository. There you can also find additional technical information for both this project and the PiJuice in general.
Step 1 – Prepare a micro SD card with the latest version of Raspbian Lite. The link also provides information on how to flash the image onto the SD card.
Insert the micro SD card in and press SW1 on the PiJuice to start the OS.
As this is going to be an headless setup make sure to add an empty ssh file to your SD card. Similarly you can also create a wpa_supplicant.conf to be placed in the boot partition of the SD card.
It will be looking like:
ctrl_interface=DIR=/var/run/wpa_supplicant GROUP=netdevupdate_config=1country=GBnetwork={ssid="yourSSID"psk="yourWPAKey"key_mgmt=WPA-PSK} |
Using the raspi-config command enable the Raspberry Pi camera.
Run this line and the point and shoot software will be setup and installed
curl -sSL https://raw.githubusercontent.com/PiSupply/PiJuice/master/MakerKits/Nature-Juice/install.sh | sudo bash
|
Step 2 – The PiJuice can be configured by using:
pijuice_cli |
Within System Tasks enable `Software Halt Power Off` and change the `Delay Period [seconds]` to 30.

Then in IO -> IO2 so that the PIR Motion Sensor Dout pin can trigger the event to power on the Raspberry Pi we need to change the IO2 settings as follows:
Mode: DIGITAL_INPull: PULLDOWNwakeup [0/1]: RISING_EDGE |

Finally in Battery Profile you will also need to configure the battery characteristics. For this project we have used a 5000mAh which can be chosen from the list of available profiles as LIPO_5000.
Step 3 – Reboot the OS
You can monitor the logs by using the following command:
tail -f logs: /var/log/naturebytes_camera.log |
and you will find the pictures in:
images: /var/lib/nature-juice |
You can follow our guide on Github to know more about preparing the software.