Set Up Your JustBoom With Rune Audio
This guide will show you how to obtain, install and configure Rune Audio for a JustBoom card.
Remember that this guide will cover slightly different steps when using the Raspberry Pi Zero.
Before you start.
Rune Audio has been tested with:
- JustBoom Amp HAT
- JustBoom DAC HAT
- JustBoom Digi HAT
- JustBoom Amp Zero
- JustBoom DAC Zero
- JustBoom Digi Zero
Section 1 – Retrieve the image
Step 1 – With your browser head to Rune Audio and click the download link.

Step 2 – Use our favourite tool Etcher to transfer the image onto a Micro SD card. Select the image you want to flash, choose the drive on which to write and flash the card.
Note that a card of 4GB or more is required.

Step 3 – After a while your image will have been written onto your Micro SD card. Remove it from your reader and insert it in your Raspberry Pi.
Make sure that you have followed one of our assembly guides before you get to this point.

Section 2 – Access Rune’s HotSpot
When Rune Audio starts, it will automatically connect to a configured Wi-Fi if setup previously, otherwise it will create a local Wi-Fi hotspot for you to connect to

Step 1 – The easiest way to connect to Rune’s via its HotSpot is to use a mobile phone, alternatively use your computer or tablet. With it connect to the RuneAudioAP SSID using password RuneAudio (Case sensitive).

Step 2 – With your browser point to http://runeaudio.local. This should take you to Rune Audio’s home page.
Click on the Menu in the top right corner of the screen then click on “Network”.

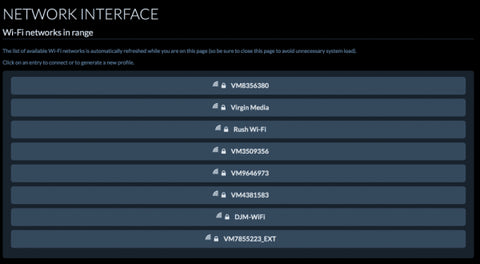
Step 3 – Click on “Wlan0” Select your home SSID and set the WPA passkey then click on the connect button as shown in the picture.
Rune is now connected to your network.

Section 3 – Configure Rune Audio
Step 1 – Power up your Raspberry Pi and wait a couple of minutes for the OS to boot up completely.
Point your browser to http://http://runeaudio.local to be redirected to Rune’s main page.

Step 2 – Select “Settings”.

Step 3 – Choose your device from “I2S Kernel Modules” drop-down list according to the following:
- JustBoom DAC Boards for DAC HAT or DAC Zero
- JustBoom Amp Boards for Amp HAT or Amp Zero
- JustBoom Digi Boards for Digi HAT or Digi Zero
Then “Apply Settings” to save the configuration.

Step 4 – Select “Turn off” from the menu on the right and click on the “Restart” button.
You will now be able to enjoy Rune with your JustBoom card.

